Site Menu
On Social:

Super Sledge

Fallout Universe|

When you think about melee weapons in Fallout, it’s hard to not instantly think about the Super Sledge. The weapon received a fresh redesign in Fallout 4, moving it from appearing entirely ridiculous to, well, still ridiculous, but also made from enough real-world parts that you could almost see it working. It was a fresh dose of sudo realism that many of Fallout’s arsenal received with the game, but in my opinion, it made the Super Sledge stand out in particular.

Originally, I honestly hadn’t planned on building any melee weapons, but after coming across Michael Daniel Miller‘s recreation of the sledge on MyMiniFactory, that very much changed. Down to the nuts and bolts that hold this absurd contraption together, Michael did an insane job of faithfully recreating the weapon for print. If you have a printer and love Fallout, you’d be doing yourself a disservice to not build your own.

Project Details

Project Type:

Prop Melee

Build Type:

3D-Printed, PLA+

Origin:

Fallout Universe

Prepping For Paint

Print Jobs Overview

Job 1:

  • Sledgehammer-Body-1.STL
  • Rocket-Bottom-Half-1.STL
  • Rocket-Front-Half-1.STL
  • Left-Pipe-1.STL
  • Right-Pipe-1.STL
  • Grip-Bar-1.STL
  • Big-Middle-Rod-Trigger-Holder-1
  • Rocket-Shield-1.STL
0.4mm Nozzle
0.12mm Layer Height
80mm/s Print Speed
210 C Tool / 60 C Bed
eSun Pro PLA (1.75mm, White)
15% Infill, Normal Supports
Brim
38h 0m Print Time
0.4mm Nozzle
0.12mm Layer Height
80mm/s Print Speed
210 C Tool / 60 C Bed
eSun Pro PLA (1.75mm, White)
15% Infill, No Supports
Raft Included
1h 0m Print Time

Job Notes:

This job failed due to the raft releasing from the build plate. Rocket-Pin-1.STL was the only successful print from this job. The other files were reprinted individually.

0.4mm Nozzle
0.12mm Layer Height
80mm/s Print Speed
210 C Tool / 60 C Bed
eSun Pro PLA (1.75mm, White)
15% Infill, Tree Supports
Raft Included
0h 45m Print Time
0.4mm Nozzle
0.12mm Layer Height
80mm/s Print Speed
210 C Tool / 60 C Bed
eSun Pro PLA (1.75mm, White)
15% Infill, Tree Supports
Raft Included
0h 45m Print Time
0.4mm Nozzle
0.12mm Layer Height
80mm/s Print Speed
210 C Tool / 60 C Bed
eSun Pro PLA (1.75mm, White)
15% Infill, Tree Supports
Raft Included
1h 30m Print Time
0.4mm Nozzle
0.12mm Layer Height
80mm/s Print Speed
210 C Tool / 60 C Bed
eSun Pro PLA (1.75mm, White)
15% Infill, No Supports
Raft Included
13h 45m Print Time
0.4mm Nozzle
0.12mm Layer Height
80mm/s Print Speed
210 C Tool / 60 C Bed
eSun Pro PLA (1.75mm, White)
15% Infill, No Supports
Raft Included
4h 30m Print Time

Job Notes:

Due to the dowel at the top of this piece being slightly too large for the corresponding hole on Super-Sledge-Grip-Bar-1.STL, mistakes were made while attempting to sand down the dowel (aka, why this reprint is numbered).

0.4mm Nozzle
0.12mm Layer Height
80mm/s Print Speed
210 C Tool / 60 C Bed
eSun Pro PLA (1.75mm, White)
15% Infill, Tree Supports
Raft Included
5h 30m Print Time

Job Notes:

I briefly rage-quit printing following this job.

0.4mm Nozzle
0.12mm Layer Height
80mm/s Print Speed
220 C Tool / 60 C Bed
eSun Pro PLA (1.75mm, White)
15% Gyroid Infill, No Supports
Raft Included
5h 15m Print Time

Job Notes:

Slightly increased print temperature for stronger layer fusing, changed infill pattern to increase part strength.

0.4mm Nozzle
0.12mm Layer Height
80mm/s Print Speed
220 C Tool / 60 C Bed
eSun Pro PLA (1.75mm, White)
15% Gyroid Infill, No Supports
Raft Included
5h 0m Print Time

Job Notes:

As with the other reprint, slightly increased print temperature for stronger layer fusing, changed infill pattern to increase part strength.

0.4mm Nozzle
0.12mm Layer Height
80mm/s Print Speed
210 C Tool / 60 C Bed
eSun Pro PLA (1.75mm, White)
15% Gyroid Infill, Tree Supports
Raft Included
3h 45m Print Time
0.4mm Nozzle
0.12mm Layer Height
80mm/s Print Speed
210 C Tool / 60 C Bed
eSun Pro PLA (1.75mm, Gray)
15% Gyroid Infill, Tree Supports
Raft Included
4h 30m Print Time

Job Notes:

For whatever reason, gray seems to be the best color for eSun’s Pro PLA.

0.4mm Nozzle
0.12mm Layer Height
80mm/s Print Speed
210 C Tool / 60 C Bed
eSun Pro PLA (1.75mm, Gray)
15% Gyroid Infill, Tree Supports
Raft Included
4h 30m Print Time
0.4mm Nozzle
0.12mm Layer Height
80mm/s Print Speed
210 C Tool / 60 C Bed
eSun Pro PLA (1.75mm, Gray)
15% Gyroid Infill, No Supports
Raft Included
1h 15m Print Time
0.4mm Nozzle
0.12mm Layer Height
80mm/s Print Speed
210 C Tool / 60 C Bed
eSun Pro PLA (1.75mm, Gray)
15% Gyroid Infill, Tree Supports
Raft Included
1h 30m Print Time
0.4mm Nozzle
0.12mm Layer Height
80mm/s Print Speed
210 C Tool / 60 C Bed
eSun Pro PLA (1.75mm, Gray)
15% Gyroid Infill, Tree Supports
Raft Included
1h 30m Print Time
0.4mm Nozzle
0.12mm Layer Height
80mm/s Print Speed
210 C Tool / 60 C Bed
eSun Pro PLA (1.75mm, Gray)
15% Gyroid Infill, Tree Supports
Raft Included
1h 30m Print Time
0.4mm Nozzle
0.12mm Layer Height
80mm/s Print Speed
210 C Tool / 60 C Bed
eSun Pro PLA (1.75mm, Gray)
15% Gyroid Infill, Tree Supports
Raft Included
1h 30m Print Time
0.4mm Nozzle
0.12mm Layer Height
80mm/s Print Speed
210 C Tool / 60 C Bed
eSun Pro PLA (1.75mm, Gray)
15% Gyroid Infill, No Supports
Raft Included
1h 0m Print Time
0.4mm Nozzle
0.12mm Layer Height
80mm/s Print Speed
210 C Tool / 60 C Bed
eSun Pro PLA (1.75mm, Gray)
15% Gyroid Infill, No Supports
Raft Included
2h 30m Print Time
0.4mm Nozzle
0.12mm Layer Height
80mm/s Print Speed
210 C Tool / 60 C Bed
eSun Pro PLA (1.75mm, Gray)
15% Gyroid Infill, No Supports
Raft Included
0h 30m Print Time
0.4mm Nozzle
0.12mm Layer Height
80mm/s Print Speed
210 C Tool / 60 C Bed
eSun Pro PLA (1.75mm, Gray)
15% Gyroid Infill, Tree Supports
Raft Included
3h 30m Print Time

Job Notes:

I opted to reprint the sledge pipes in a different orientation with more graceful supports, resulting in better quality prints for portions of the part that are most visible.

Additional Print Notes

Many of the parts for this project ended up being printed by themselves, mainly so I could print them vertically with a minimized risk of them being knocked over during print. This is how I get the highest quality out of my current configuration, but they could be consolidated and printed horizontally if you wanted to save time. If you do opt to print vertically, I highly recommend rafts and tree supports to help keep the pieces in place. If it doesn’t seem like enough supports are being generated for a given piece, decrease the value for the Support Overhand Angle setting (if using Cura) to generate them more aggressively.

Once printed, I encountered a few issues assembling different parts of the handle. First, the dowel designed into Super-Sledge-Top-Long-Bar-1.STL was slightly too large to fit into the hole designed into Super-Sledge-Grip-Bar-1.STL. I was eventually able to sand the dowel down to result in a perfect fit between the 2 pieces, but in the process broke a few dowels off. So…be gentle. Also not a bad idea to print with 3 walls and switch to a stronger infill pattern (hence the switch to gyroid).
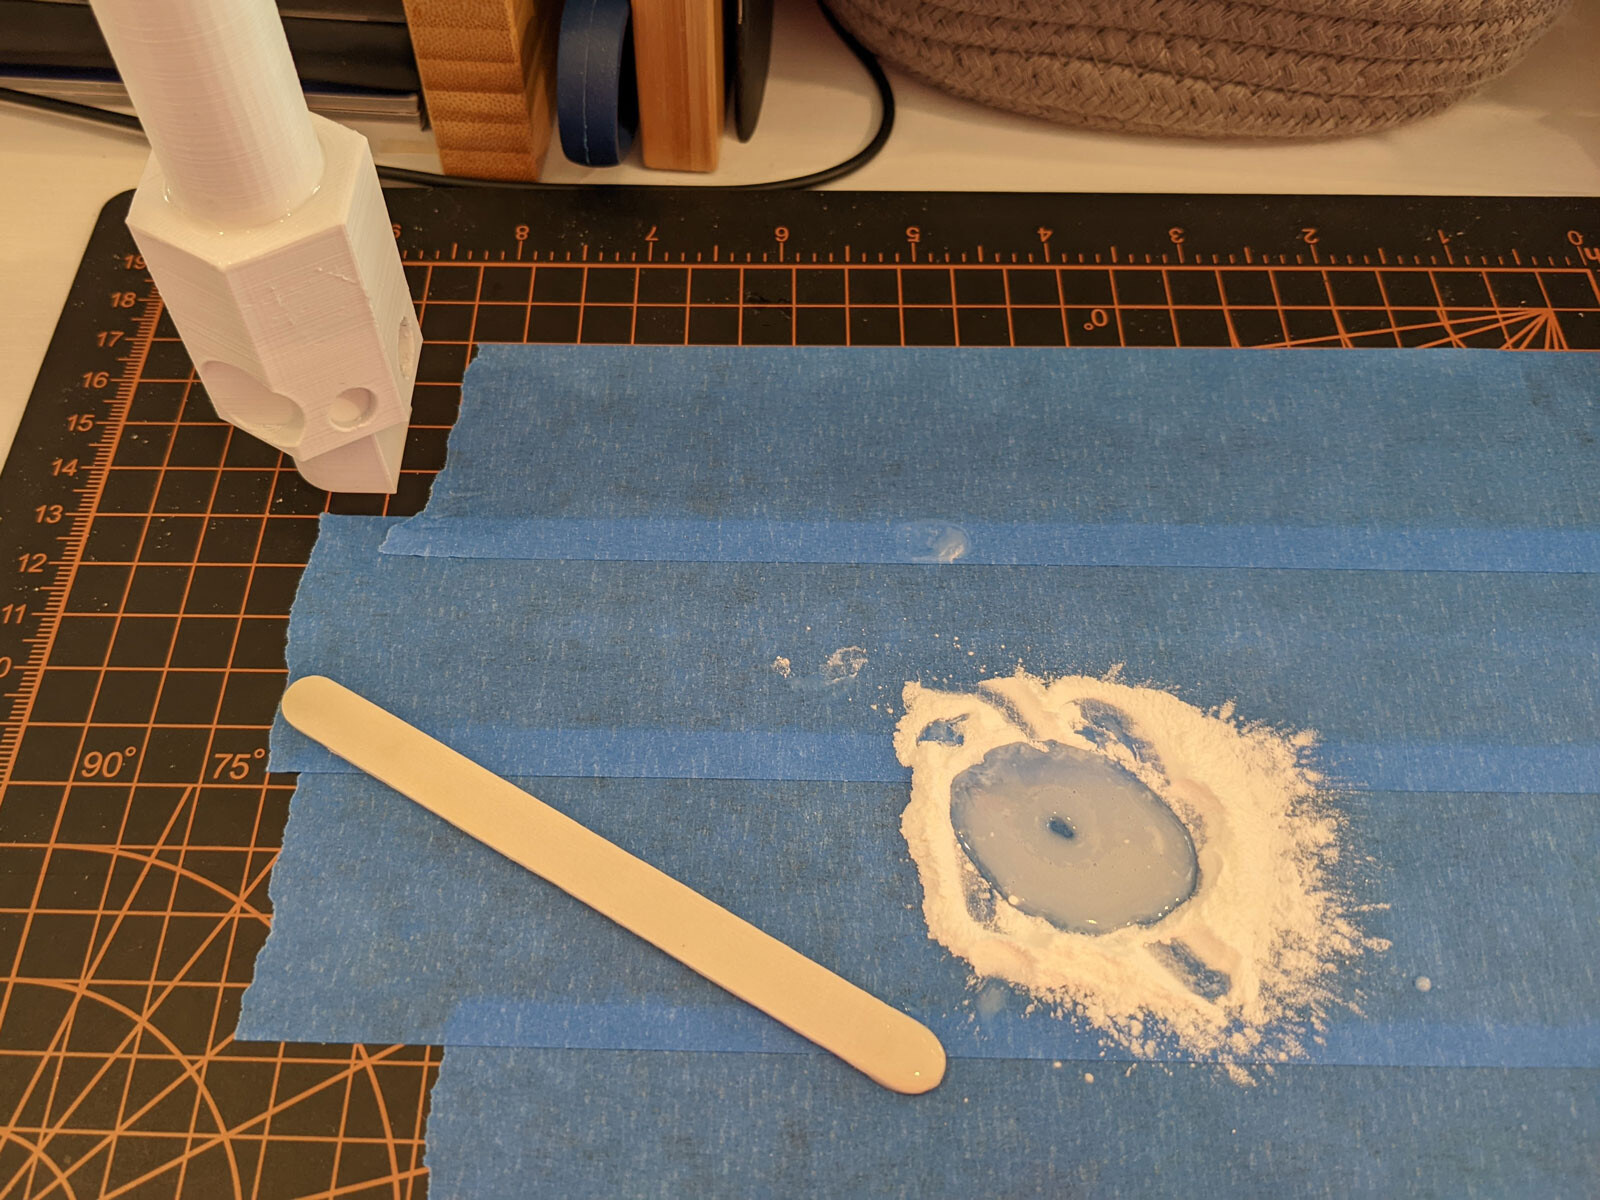
Applying a super-glue/baby-powder mix to the join between the nut and top bar

Second, while Super-Sledge-Nut-Pin-1.STL fit perfectly into Super-Sledge-Top-Long-Bar-1.STL, the dowel was too large to fit into the opening on the bottom of Super-Sledge-Nut-1.STL. To fix this, I superglued the pin into the long bar, then sanded down the remaining portion of the pin until it fit into the nut (that’s what she- nevermind). I probably should have sanded the pin down more, as I tried inserting it a bit too early and the piece is now fully stuck in the nut without the need for superglue, leaving me a bit paranoid about the pieces staying joined long-term. To combat this paranoia, I mixed some superglue with some baby powder (thanks Punished Props!) and filled in the area where the two pieces join, which I’ll sand down once cured.

As with everything I print, there’s a great chance these issues were caused by a printer configuration issue on my end, though I haven’t had any other issues with dimensional accuracy. Either way, the final product looks freakin’ epic and Michael Daniel Miller did an absolutely amazing job with this model.
Parts Assembly & Sanding

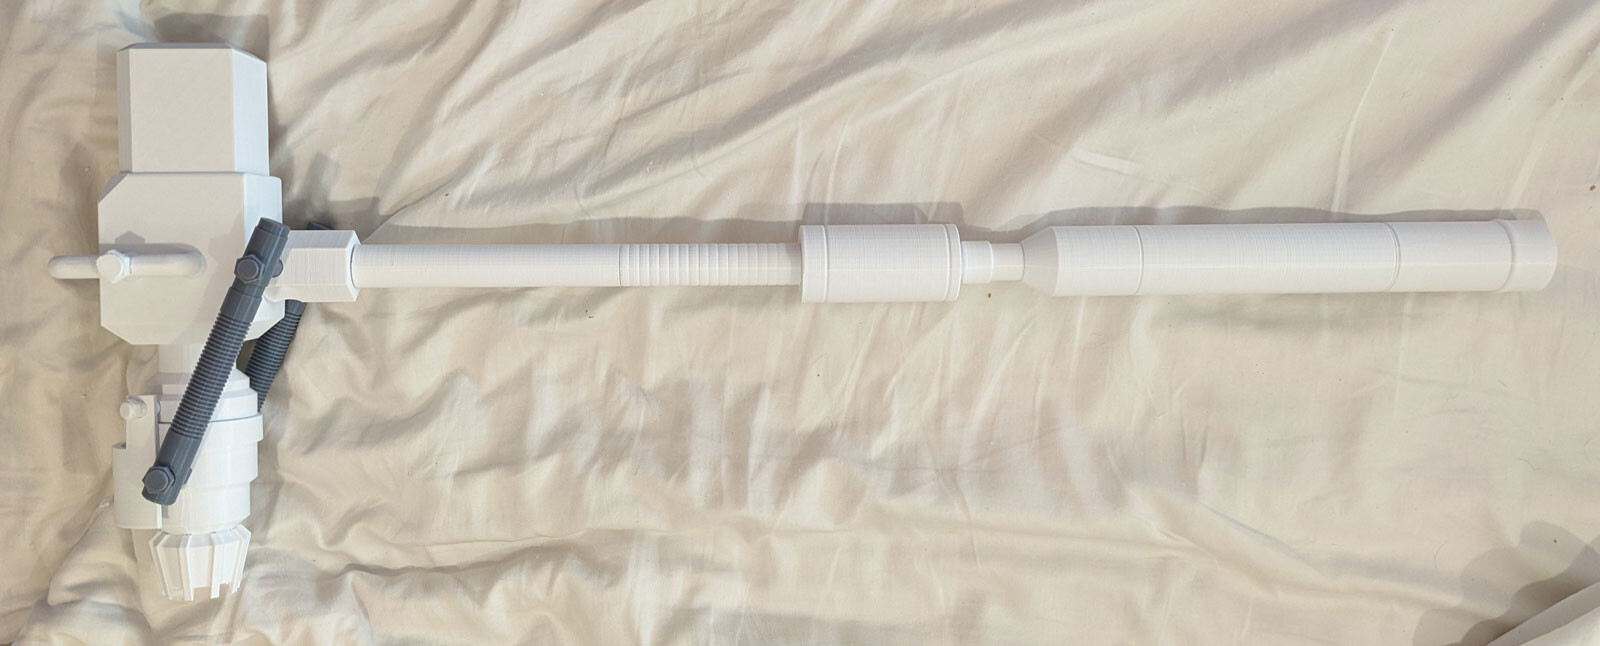
The printed out super sledge, minus and few parts and pre-sanding.

With the prop now printed, I’m currently in the process of separating it out into sections by final color, which will be glued and sanded. But more on this soon…